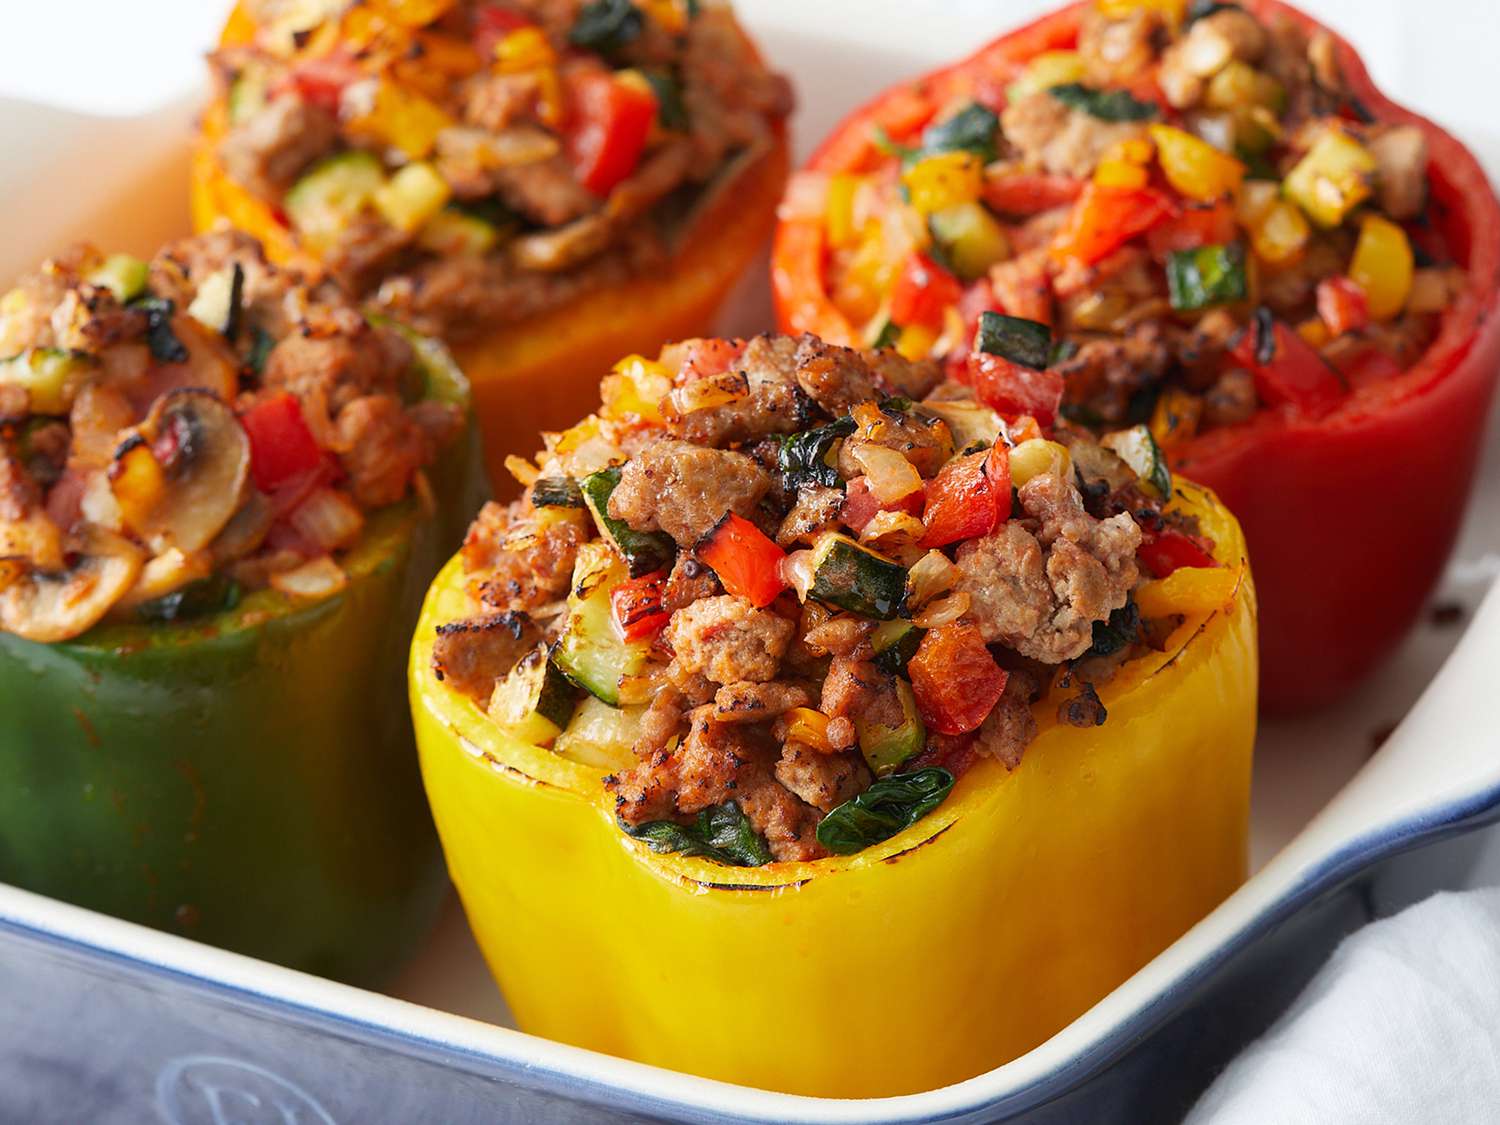
Stuffed peppers are so easy to make, but yet can impress people and look like a 5 Star recipe, trust me if your single and want to impress someone this is your dish, its amazing!
Phase 1 Ingredients
4 Sweet Peppers Ghost pepper sauce Sweet Thai Chili Sauce Tomato Ketsup Apple Cider Vinegar Korean wing sauce 2 Cups of rice 2 TBS Smoked Paprika 3 Spoons of garlic paste 3 Chopped up onions 3 Spoons of ginger paste 1 Pack of ground chicken 3 Carrots food processed 1 Can of olives food processed 1 Block of cheese of your choice 8 Sweet peppers
Phase 2 Instructions
In a small bowl, add ghost pepper sauce, tomato ketsup, add some apple cider vinegar, sweet thai chili sauce, korean wing sauce, add some smoked paprika, mix well, and sit aside.
In an oiled frying pan, put your onions, add your ginger and garlic paste, keep mixing it in, add a pack of ground chicken (You can use something else if you’d prefer) make sure your meat is fully broken up and cooked, Add your carrots, and now your olives, and start adding your rice, and make sure you mix it all in, and add your cheese, and then mix your sauce.
Cut your peppers at the top, clean them out, and then put your mix in, stuffing them completely full put the tops on
Preheat your oven to 350 degrees and then bake for 20 minutes
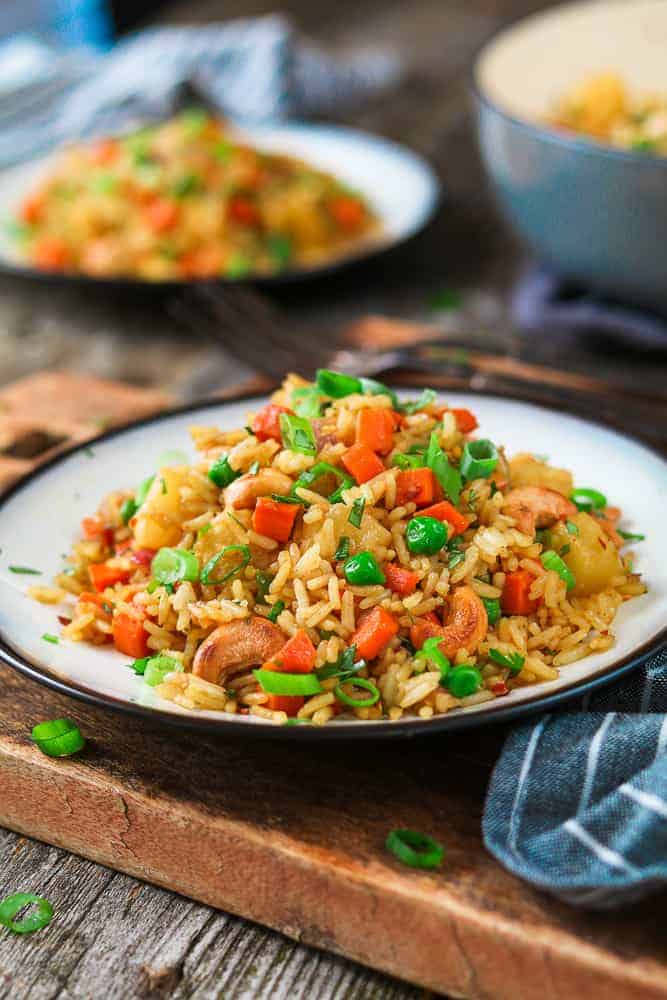
We absolutely love Pinapple fried rice, it tastes amazing, and is a wonderful side dish, or even a full meal.
Phase 1 Ingredients
4 Sticks of Celery Chopped 1 Green pepper chopped 3 Onions chopped 3 Cloves of garlic chopped 2 Tomatoes chopped 4 Cups of rice made Rice wine vinegar 2 Cups of chopped pineapple 2 TBS of soya sauce 3 Chicken breasts cubed 1 TBS spiced rum 1 TBS of white pepper 2 TBS nutmeg 1 TBS of oregano One thing of green onion
Phase 2 Instructions
Make your rice the night before, over night is the best.
In your wok add your onions, and start to cook these down add your garlic, Add your chicken, pour in your rum, when the chicken is white an done, start to put the rice in, now add in your veggies, and stir in, now your rice wine vinegar, nutmeg, oregano, and finally your pineapple, make sure you stir everything., and then top with green onion, this is super easy, and tasty, and didn’t much effort!
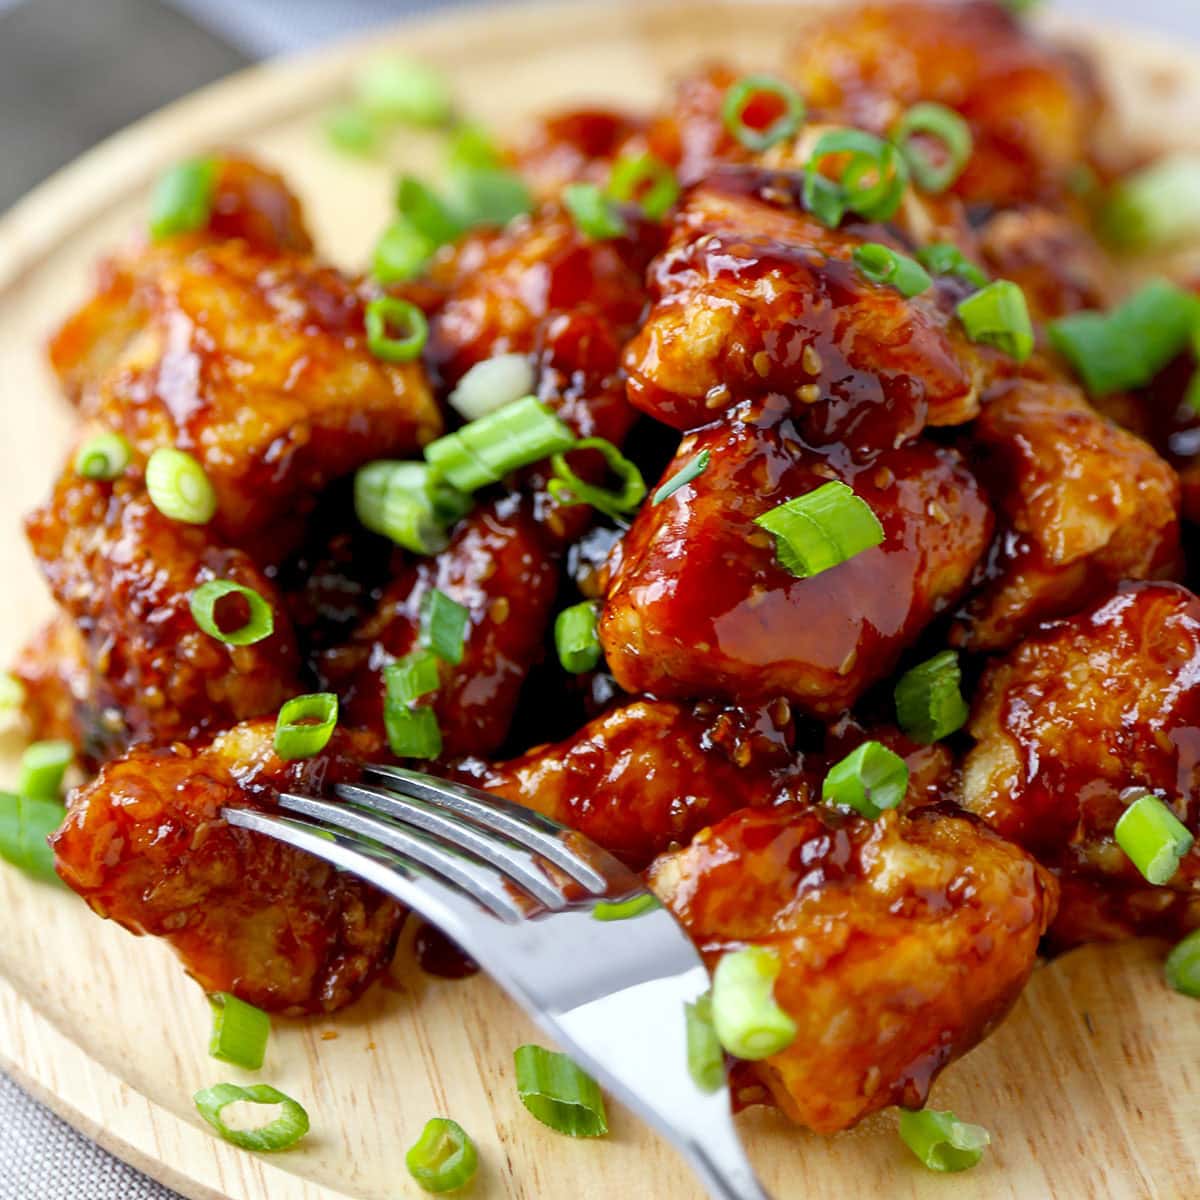
This is a great dish, made after Chinese, and is easy simple, and yet so tasty!
Ingredients
6 squirts of Sesame seed oil 8 Chicken cutlets 3 TBS Black pepper Chopped Ginger 1 Large onion diced. 3 Cloves of garlic 1 Green onion minced 2 Sticks of celery chopped Half a cup of mushrooms 1 TBS or rosemary 2 TBS ginger powder A few squirts of rice vinegar A few squirts of soya sauce A few squirts of lime juice Sesame seeds
Phase 2 Instructions
In a bowl take your chicken cutlets add your sesame oil, use lots of black pepper, and ginger, and let this sit over night.
Pour some seasame seed oil in your wok put the chicken cutlets in the wok, add your onion, you want to keep mixing this really well.
Add your garlic, add your celery, mushrooms, and rosemary and ginger powder, add some rice vinegar, and add some soya sauce, add some lime sauce.
Serve with rice, and sprinkle some sesame seeds over and your done!
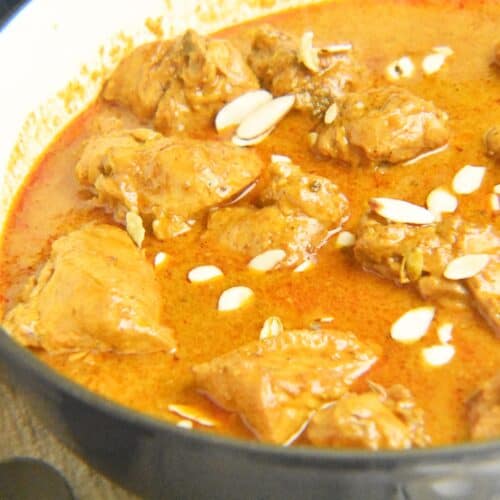
This is a great dish, its quick and easy, and should be absolutely flavorful and just a great comfort food.
Phase 1 The Ingredients
2 Cups of cooked rice 4 Chicken Breasts Cubed up 2 Diced up Onions Korma sauce Curry Masuala 3 TBS Tajin 3 TBS turmeric
Phase 2 Instructions
Get your wok ready, with some oil get it nice and hot, put your onion in and caramalize it, and then run it through a food processor or blender to get it to a puried state.
Cook your chicken until its fully cooked, make sure you keep enough oil in the pan, pour in the pureed onion in with the chicken, pour your sauce in, add 3 TBS of Tajin, add 3 TBS of turmeric
This is a funny, hot but tasty recipe, it is Jamaican but one my wife just had to try.
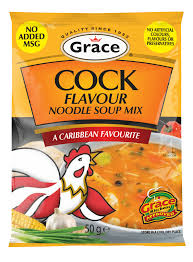
Phase 1 Ingredients.
Cock Soup package 1 Pack of ground chicken. Hot sauce Garlic powder Smoked paprika Black pepper 2 Diced up carrots 3 Chopped up cloves of garlic 3 Chopped up potatoes 1 Chopped up sweet pepper 2 Chopped up onion 1 jalopino (More depending on how hot you want it, and you can remove the seeds.)
Phase 2 Cooking!
Start to fry up your ground chicken, apply some hot sauce, then some apple cider vinger, garlic powder, smoked paprika, and black pepper, add the carrots, garlic, potatoes, sweet pepper, and half the onions and add some more hot sauce.
In a large pot filled with water, pour in your package of Cock soup mix it up and turn your heat to medium.
Take the veggies and meat combo from the frying pan and into the pot.
Start to fry up the rest of the onion and jalopino, once its sautéed enough put it into the rest of the soup.
This is a fun recipe, and yes it will get a rise out of anyone, we do enjoy it!
Add some minced garlic, you can add it from a bottle if you’d prefer.
(Keep on stiring once you add a thing in.)
Add some smoked paprika.
Add some tumeric.
Add some ginger spice.
Add some ground mustard.
Add some cardimon.
Add some funnel seeds.
Add some curry spice.
Add some cumming.
Add some canned crushed tomatoes.
Use the food processor and mince up some chestnuts and add them in.
Add a can of coconut milk.
Add your chicken.
Add your chickpeas in.
Cover and let this simmer, for about 15-20 minutes.
Add some garam Masula mix it in, and your done.
This may seem like it takes a lot of time, but it is worth every moment of it, it tastes amazing, you can add some chilies and make it hot, you can have it mild, its so easy to make and tastes great!
This is a simple easy and cheap meal to make, you probably have most of the ingredients sitting at home, so you shouldn’t need to get a whole lot.
This tastes great and has amazing flavor, we hope you like it. It is one of our favorite dishes we make!
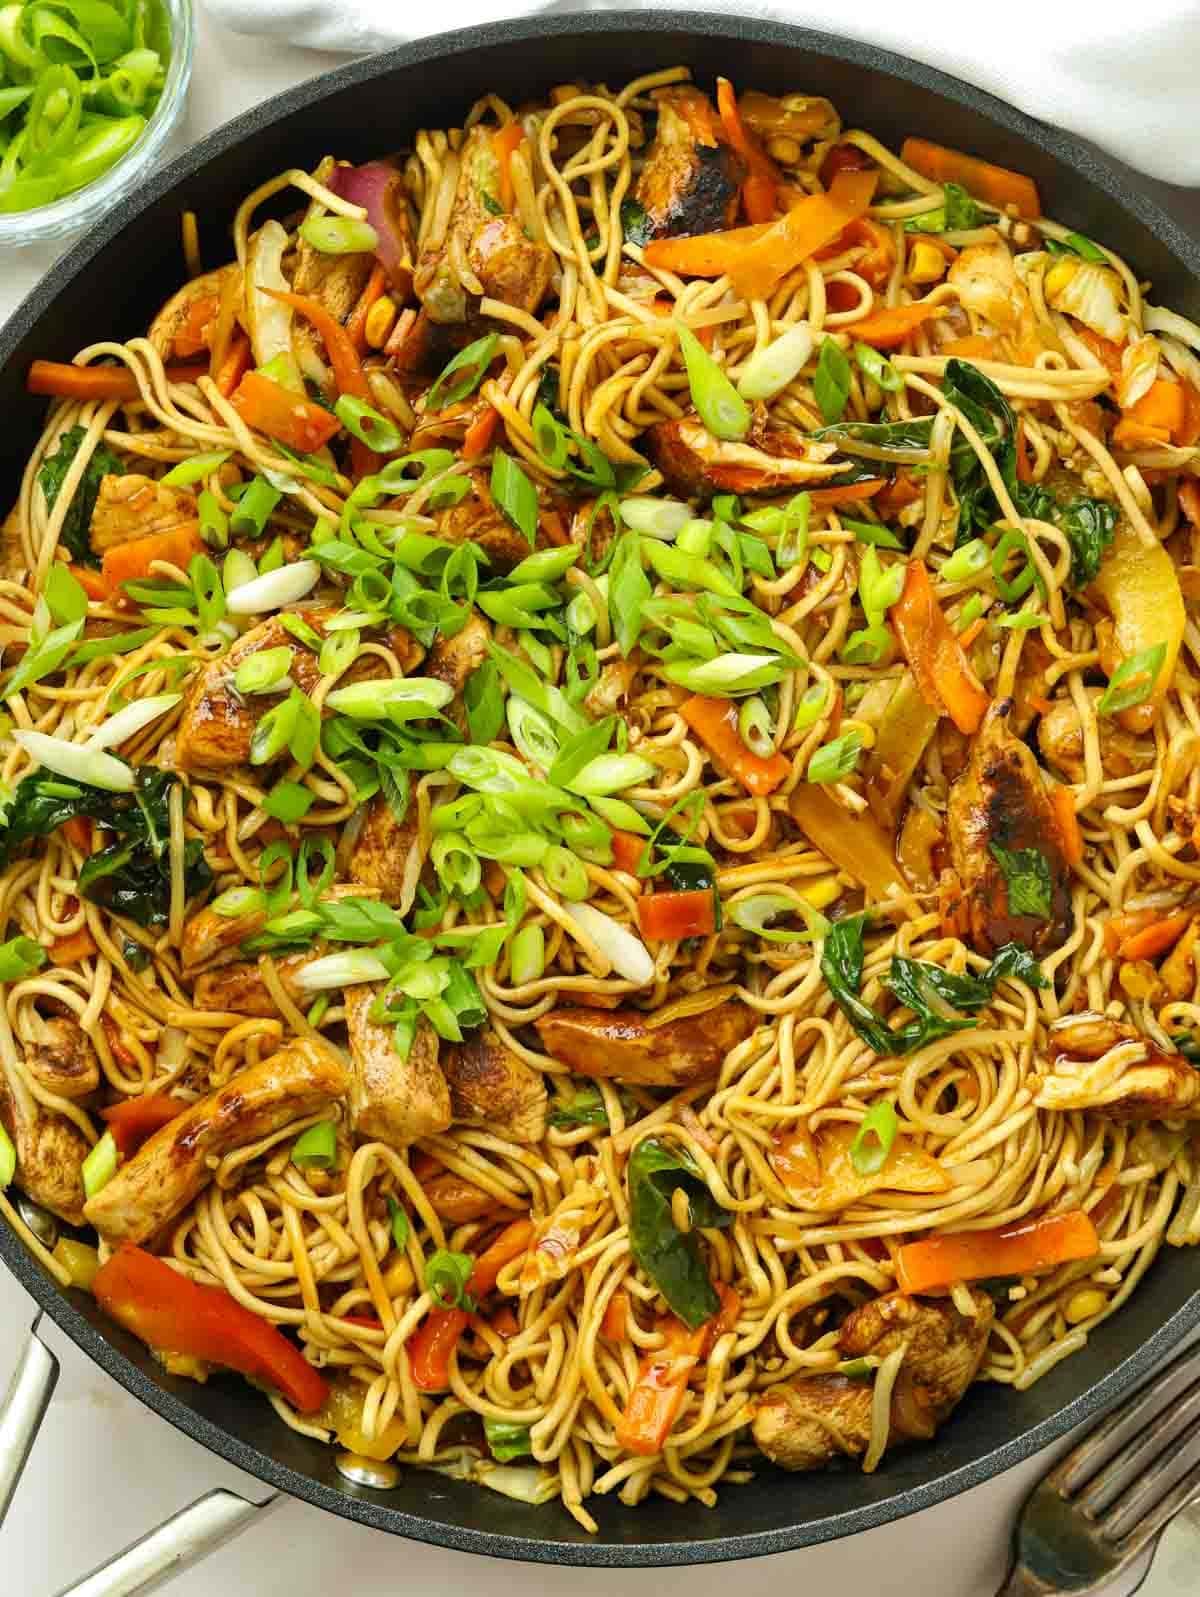
Phase 1. The Chicken.
First take the chicken give it a bit of water and some light soya sauce and some corn starch mix it up and put it in the fridge for at least 10 minutes, it will help tenderize it.
Phase 2. Prep Work.
Chop a whole cabbage very thinley.
Chop up 2 carrots to the size of match sticks or you can buy them that way.
Put some cashews through the food processor.
Either get some grated or minced ginger, and garlic or get some from the store.
Chop up a green onion.
Chop up a large onion very finely.
Phase 3. The Sauce.
Get some sauce anything you like put it in.
Add some black pepper.
Some hot sauce.
Sweet Soya Sauce.
Light Soya Sauce.
Apple Cyder Vinegar. Mix it all up really good.
Phase 4. Cook Your Chicken.
Cook your chicken in your wok, make sure its fully cooked.
(At the end you may have to use more than 1 pot depending on how much you have, and its ok, you just need to be sure mix it into the containers.
Phase 5. Noodles Time.
In the same wok, cook your chow mein noodles as per directions.
When done, drain the noodles and then set them aside.
Phase 6. Finishing It All Up
In your wok add some more oil.
Add in your onion.
Add in your garlic.
Add in your ginger.
Add om your carrots.
Add in your cabbage. It will shrink fast enough.
Add in the cashews.
Add in the sauce. Keep mixing it really good.
Phase 7. Mix And Serve.
Mix everything into a bowl and add some green onion.
We think youll enjoy this a lot, one of the best things we like to cook, and honestly simply amazing, really really tasty!
Let us know what you think, what kind of sauce do you enjoy the most?
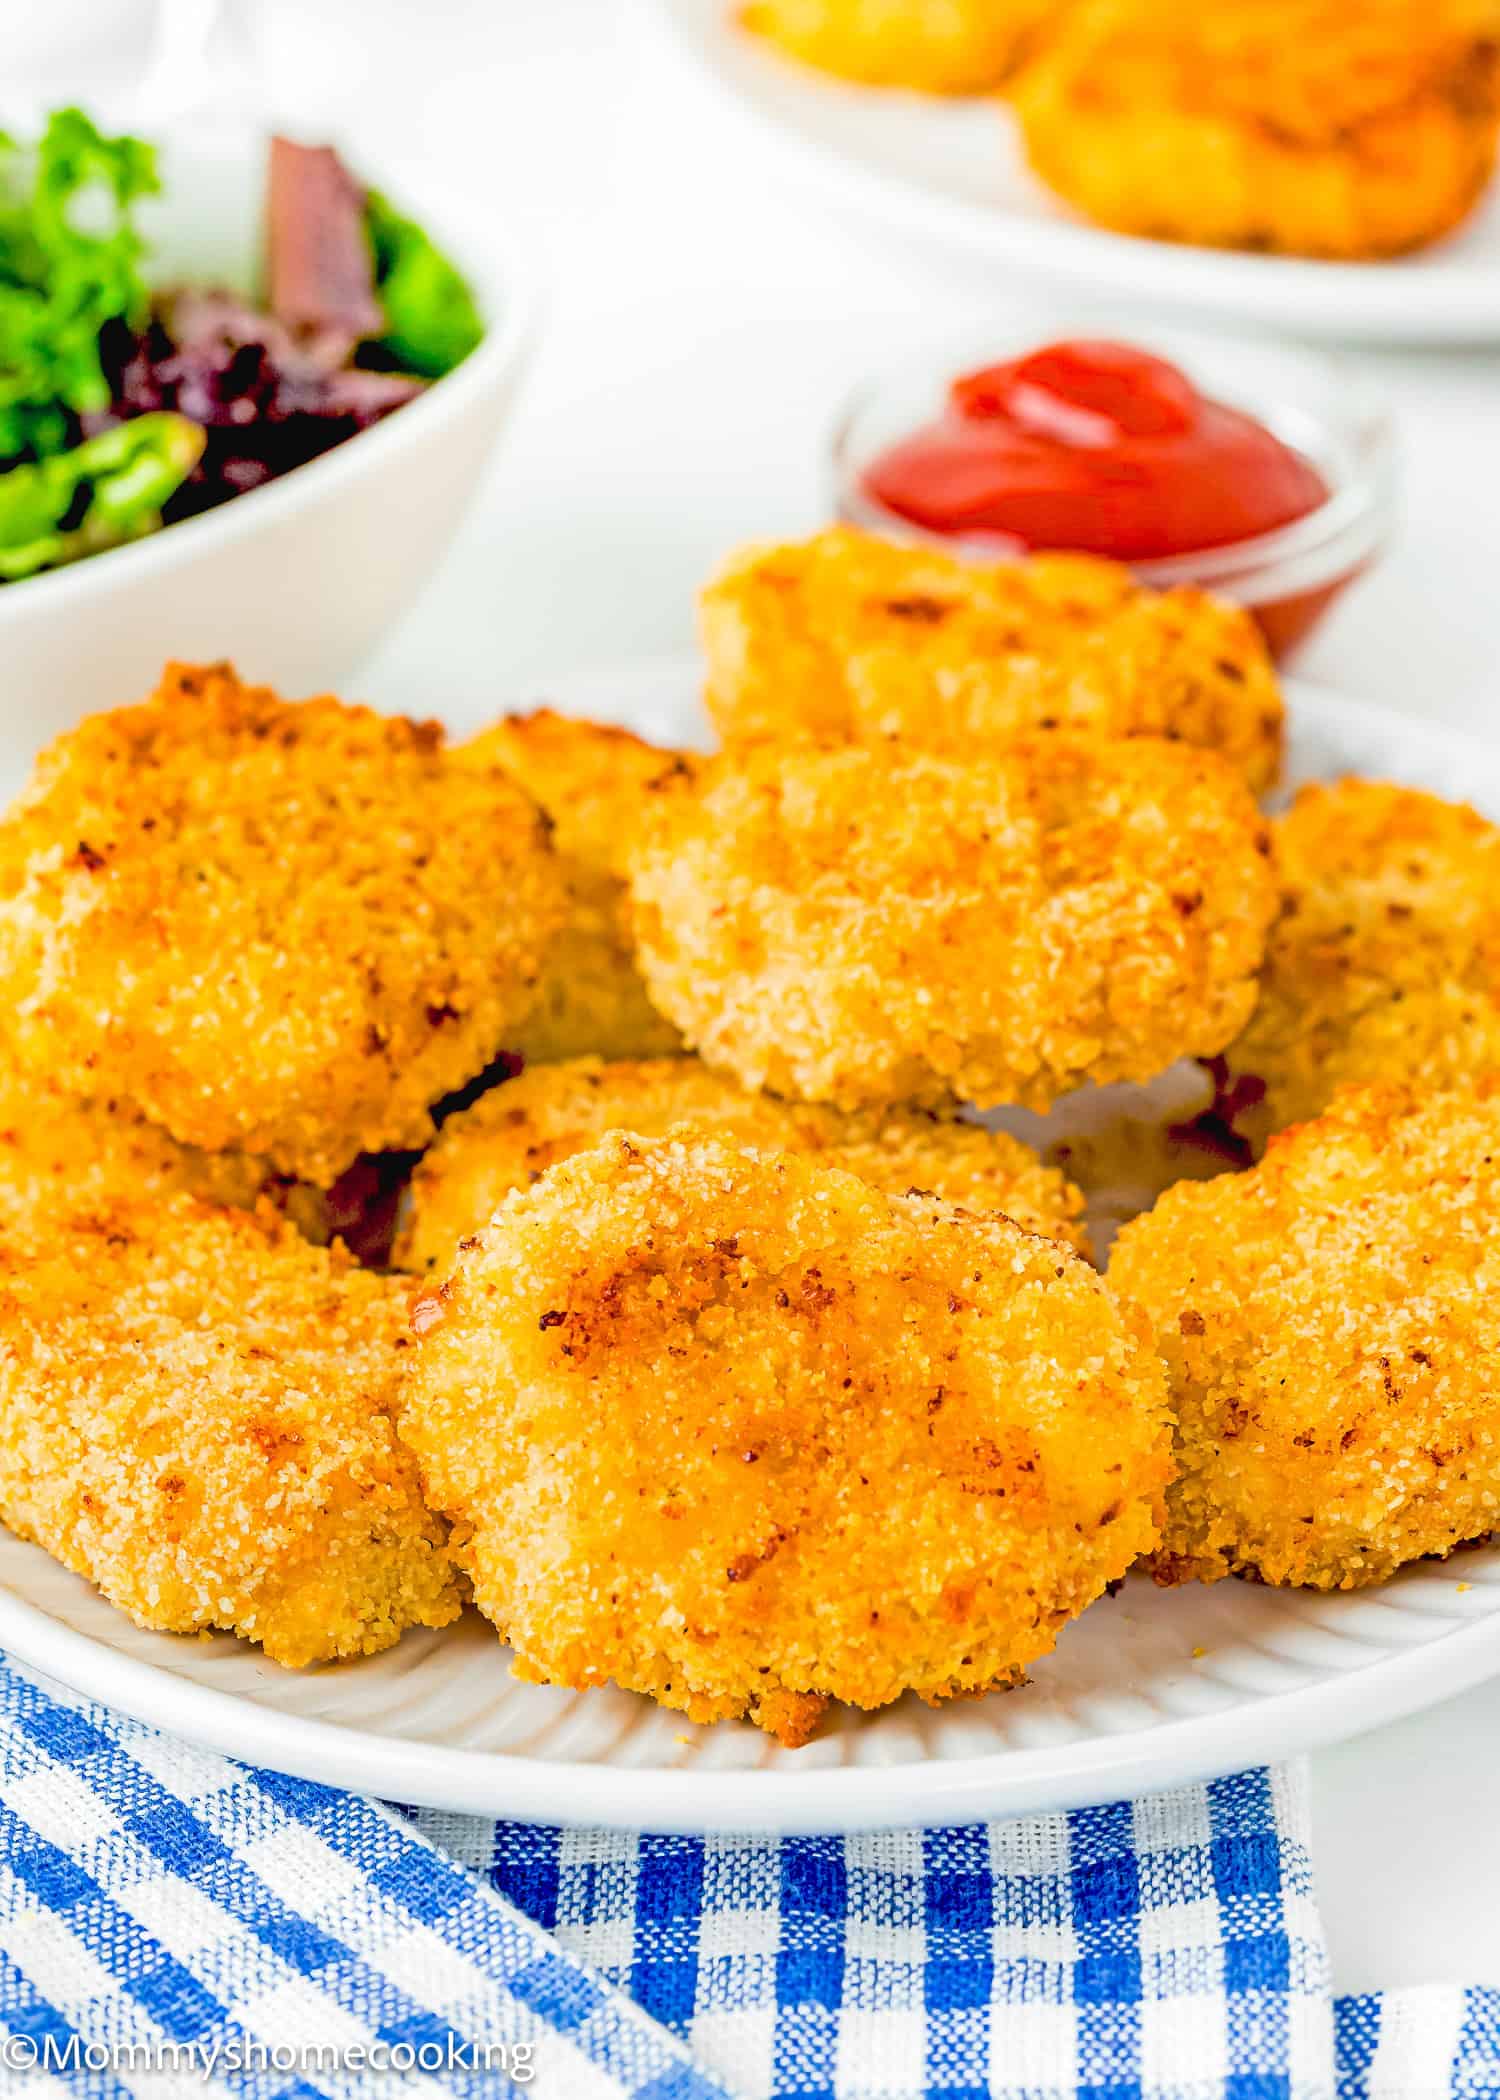
These Air Fried Chicken Nuggets are super good, and easy to make and your going to love it!
Phase 1 – Ingredients
Chicken Breasts Russet Potatoes 2 Eggs 1 Large Onion
Phase 2 – Potatoes
Make some mashed potatoes the way you like them and works for you, don’t worry about the extra just simple mashed potatoes, boil the up then mash them up.
Phase 3 – Food Processor
Put a large onion in the food processor Put some chicken breasts in the food processor Process it until its completely done you want it at the consistancy that its almost like crumbs Add it to the potatoes Add 2 Eggs Add the following spices Ground black pepper Onion Powder Dill Cayenne pepper Tumeric Mix it all together so that it is completely mixed.
Phase 4 – Cooking
Pre heat your air fryer, (works best with this.) Shape into nuggets and air fry on 400 for 20 minutes.
Serve with some sauce, and veggies, it tastes great, healthy and a fun dish, we hope you like it!
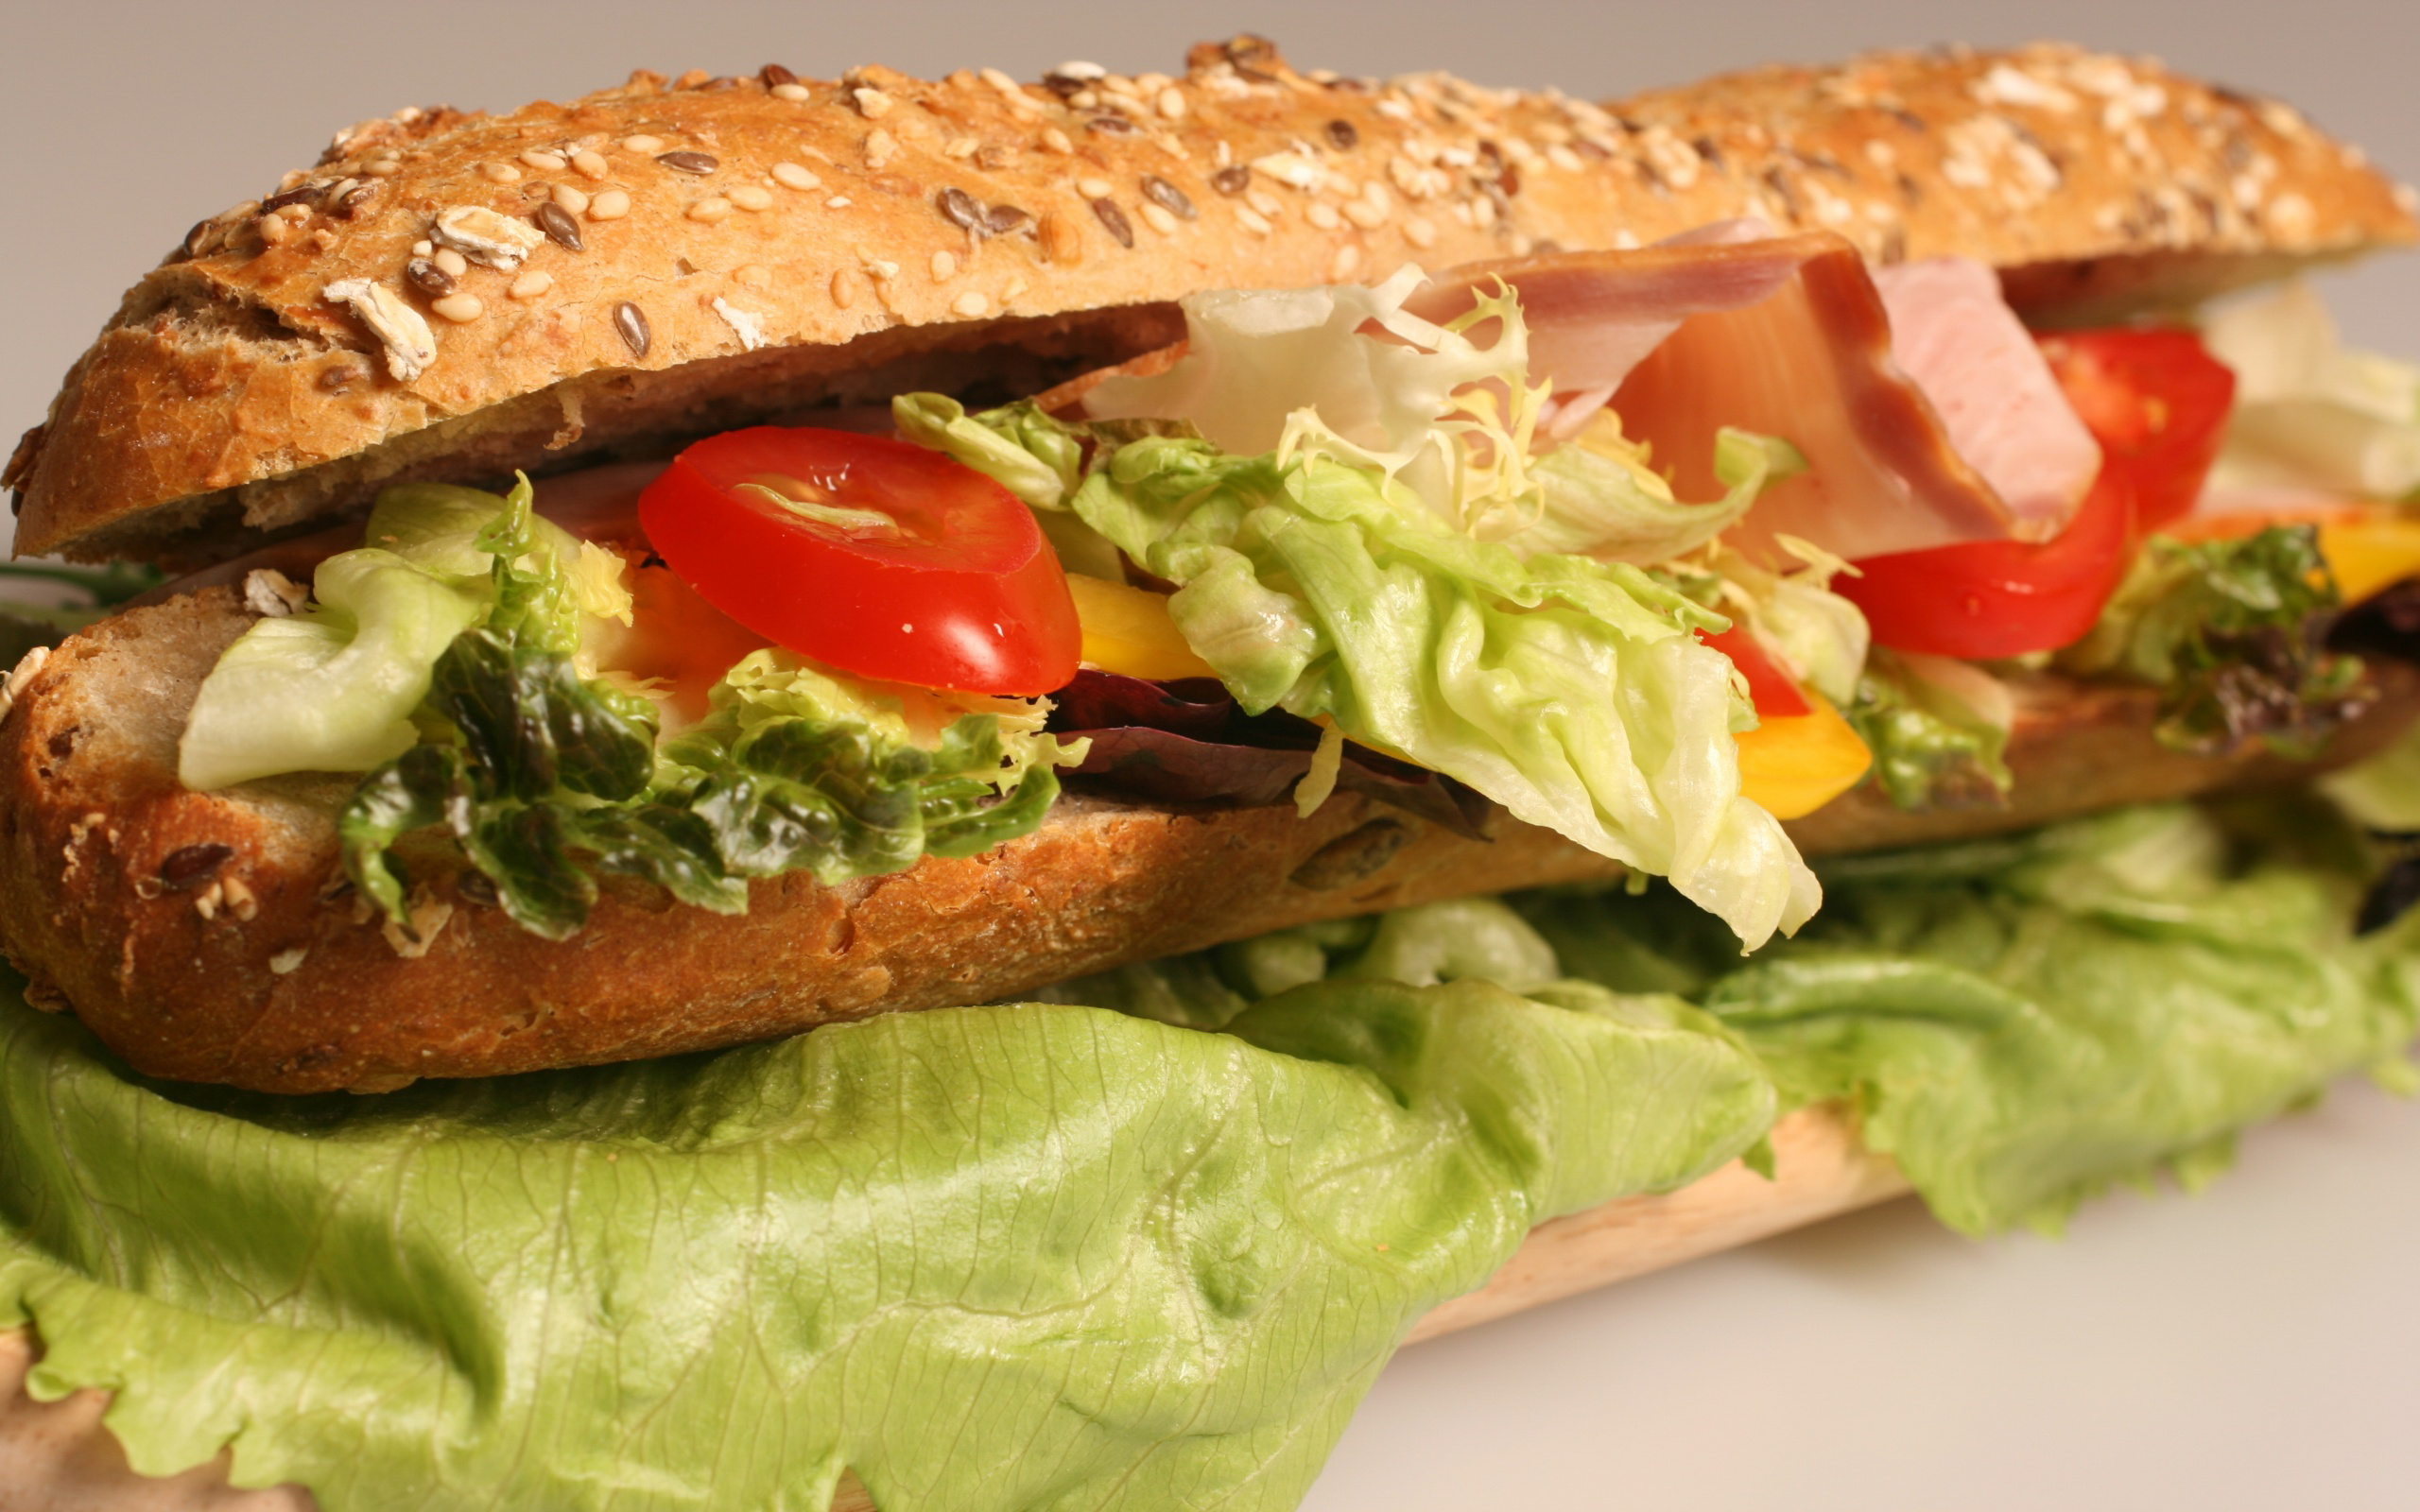
Sandwiches are great, but ever wonder why yours looks bad and get stuck buying one just to get one that looks and tastes great?
I’ve been guilty of it, and I know so have you, but here is the thing, you have to consider the quality of meat your using, the type of bread or bun your using, and sauce and how its going together, it really does mater.
So lets take some time and think about it.
Phase 1. The meat!
The meat is a big part of a sandwich, and often if you go to the store and buy sandwich meat, its thin, not as flavorful and just not the best quality around, so what do we do?
In our video here we used chicken, but you can use pork or a beef product, season it to what you like, pepper, salt if you must (I like low sodium myself), maybe some honey, and bake it until its cooked , but you want it moist.
When done take it out of the oven, let it cool and then slice it thin, or however you like it, many of us don’t have a meat slicer and thats ok, (who has room for that anyways.), when done put it in the fridge for a bit.
Phase 2. Veggies.
Cut up your veggies nice and thin, but remember to use veggies that are dry, cukes and tomatoes are nice and all, but they can often be wet and can make your sandwich a soggy mess, so if your going to use tomatoes make sure you are not putting seeds in, this will ruin it, take those out. you want lettuce or spinach or something similar. make sure to have several varieties or your sandwich is going to be boring.
Phase 3. Sauce.
Directly on the inside of the bun on both sides, I like just plain mayo over that, it acts like a lubricant, and helps keep the bread from going soggy, you can do a mayo mix with hot sauce, or mustard or other things to give it a bit more flavor.
You can use other sauces like BBQ sauces, or a vinaigrette, or other tasty sauces you might want to include.
Phase 4. Cheese
You need cheese, plain and simple and to be honest you do not want cheesewiz, you want something of quality, you can get cheese slices, but honestly that brings you back to just making bland crap, so you can buy a block of cheese and cut that up, or go to the deli and buy a really nice block of cheese, trust me the flavor this brings is so electric and amazing, and trust me the cheese that you get from the deli is actual real cheese, and if you’ve never had it, trust me you need to.
Phase 5. Bread
You could use whtie bread, but when you buy a a good quality sandwich is it on white bread, most often it isn’t, why not choose a multi grain, or even better a nice bun, or roll, after all you want the best quality you can get, and this is going to do it.
Phase 6. Putting it all together!
Ok, so here is the fun part, not the most fun part, that is you eating it.
Take your roll and cut it down the middle, or if its bread just use both slices, but put your mayo, or mayo mix on the bottom of each side, this will act as a lubricant, which helps from keeping the juices getting your bread product
Then put some lettuce on the bottom and layering it nicely.
Now you want to take your meat and start layering that as well, giving it a nice presentation and having enough on it to make you happy.
Now start putting your veggies on it one by one, keeping in mind not to put too many veggies on it as it will make it messy and also hard to close, this isn’t a Subway sub, they do give you lots of veggies, but not a whole lot, and in the end it does look good, but the quality isn’t there.
Now your sauce you want to use, and remember do not over load this, or it is going to be messy, you want to have enough you taste and know its there and are happy, but not so much its going to over flow.
Then your cheese, and you want enough of this, especially if its from the deli.
Then lastly some more lettuce and close your sandwich.
The only thing left to do if you really want, you can put this in a pre heated oven to toast it.
But thats all, try this out some time, and if your someone who would enjoy to bring this to your work for lunch, buy the quantities for the week, and do the math, I bet you its cheaper than buying it every day, and honestly your co workers are going to be jelous!
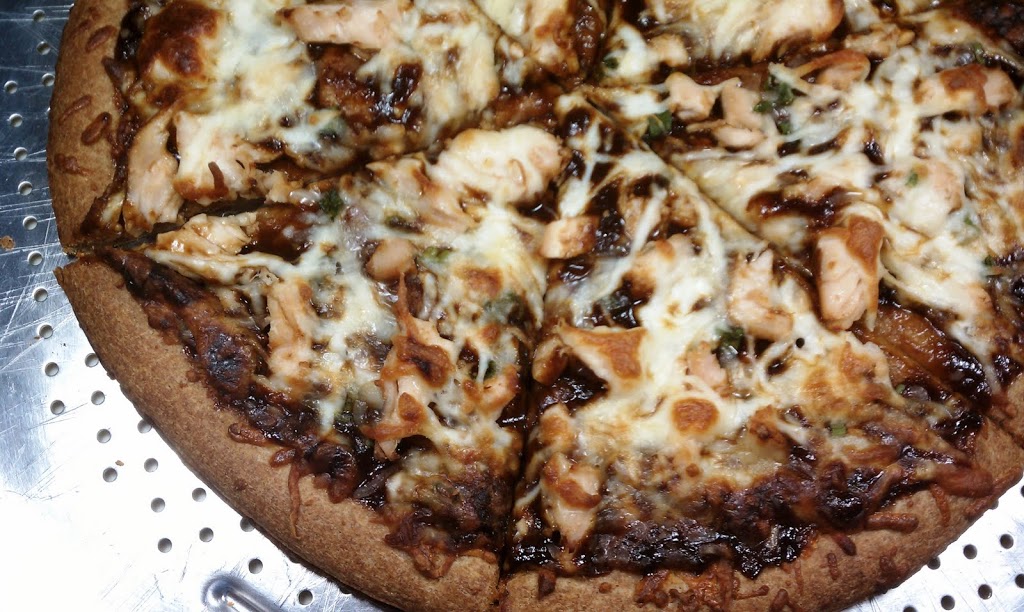
BBQ Chicken Pizza just happens to be one of my wife’s favorite pizzas, she really enjoys it,. a lot, so this is one I end up making a lot for her.
Pizza is fun to make, you can buy your crust, you can make it, and I would encourage you to get a bread maker, with the price of bread these days making your own would be so much more simple and cheaper, and making pizza dough is so much easier that way.
In this recipe I’m going to let you choose how you want your own dough, I did not include a dough making recipe as I use a bread maker, and I’m aware that not everyone does.
So lets take some chicken breast chunk it up and start cooking with it, use any spice you want, its more your taste, you can make it hot, or not the choice is yours, Make sure your using some BBQ sauce as you cook it. I would say no salt, and use pepper and garlic to it.
Make sure your chickens is fully cooked.
At this time I would go ahead and pre heat your oven to 500 degrees.
Now on your pizza dough, add a layer of BBQ Sauce, now this sauce should be something you really enjoy a good flavored BBQ Sauce will go a long way instead of just a cheap flavorless one, we are not going to be using a tomato based sauce for this just a BBQ Sauce so lets make it good.
Put your chicken over it so there is a good coverage of it.
Add some chopped up onion green pepper and mushrooms over it.
And finish off with some nice shredded cheese (Please shred this your self, pre bought is not healthy and also more expensive so its not worth the money.
When the oven is done pre heating, bake the pizza for 20 minutes, or when nice and golden (Keep an eye on it, every oven is different.)
Thats it, let the pizza cool a bit before digging in, give it at least 5 to 10 minutes, then cut it up and enjoy.
We hope you enjoy this, and try it sometime, Aimee loves sharing this one.
BTW just a side note, yes Pineapple does belong on pizza, js.