This is an easy fun, yes it takes time, but its well worth it, and an amazing meal!
Phase 1 Ingredients
1 Bag of avocados 3 Large white onion in a food processor 1 Can of crushed tomatoes 1 TBS quac spice 1 TBS Mexican oregano 2 TBS garlic powder 2 Diced up green pepper 5 Sticks of celery diced 1 Can of corn 3 TBS tajin 2 Packs of extra lean ground beef 1 Can of re fried beans 1 TBS of garlic salt 2 Cups of rice, already cooked 1 Can of crushed tomatoes 1 Block of cheese, graded up 1 Container of sour cream
Instructions
In a large bowl have your bag of advocado peeled and cut, add 2 onion add the crushed tomatoes, mash and mix everything, some quac spice, add the mexican origono, garlic powder, you want to use a potato masher, and mash and mix well.
In a big casserol dish pour the mix in and pat it down.
Fry some green pepper, celery, corn, and mix some tajin in with it, it doesn’t have to be completely soft, but soft enough, and then add to the Quac mixture packing it down, add 1 can of refried beans, add in 1 TBS of Mexican oregano, 1 TBS of garlic salt
Fry up your beef add in 1 diced up onion, add in 1 TBS garlic salt, add in your rice, amd add it in to a second cassarole, and then 1 can of crushed tomatos.
Add in some diced up cheese, add in to sour cream you can add some Quac into this if you want.
To serve this take some scoops of each casserole and put it into a container and pour your quac mix on top.
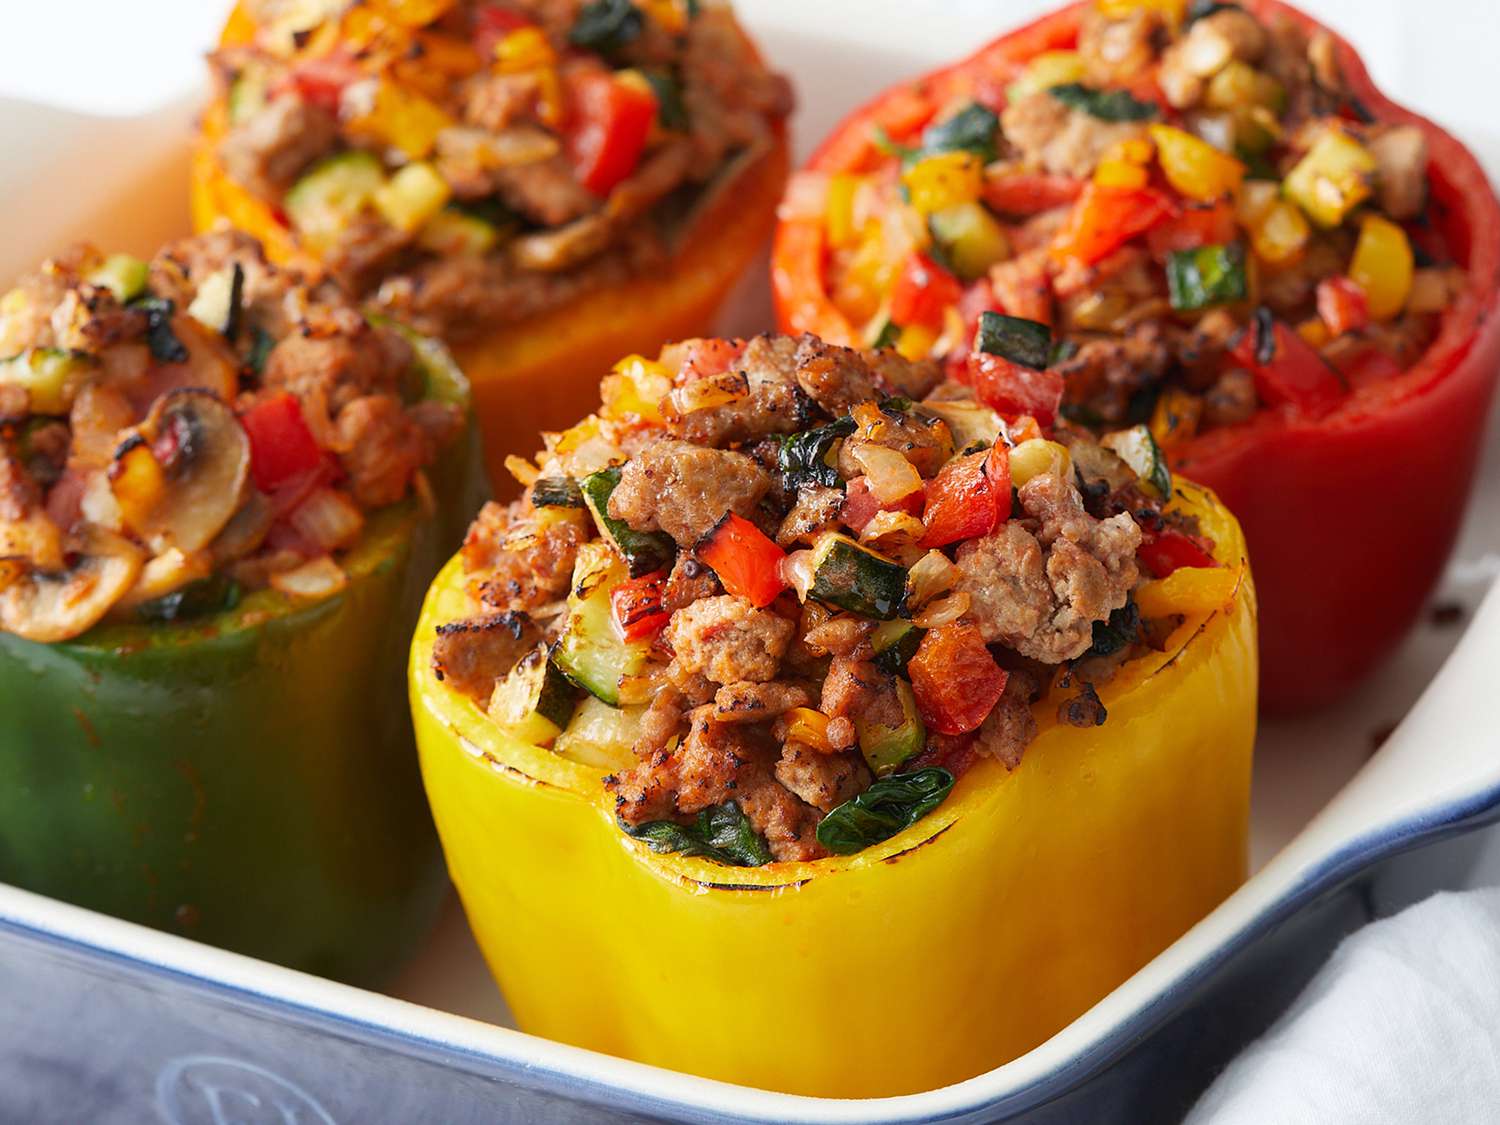
Stuffed peppers are so easy to make, but yet can impress people and look like a 5 Star recipe, trust me if your single and want to impress someone this is your dish, its amazing!
Phase 1 Ingredients
4 Sweet Peppers Ghost pepper sauce Sweet Thai Chili Sauce Tomato Ketsup Apple Cider Vinegar Korean wing sauce 2 Cups of rice 2 TBS Smoked Paprika 3 Spoons of garlic paste 3 Chopped up onions 3 Spoons of ginger paste 1 Pack of ground chicken 3 Carrots food processed 1 Can of olives food processed 1 Block of cheese of your choice 8 Sweet peppers
Phase 2 Instructions
In a small bowl, add ghost pepper sauce, tomato ketsup, add some apple cider vinegar, sweet thai chili sauce, korean wing sauce, add some smoked paprika, mix well, and sit aside.
In an oiled frying pan, put your onions, add your ginger and garlic paste, keep mixing it in, add a pack of ground chicken (You can use something else if you’d prefer) make sure your meat is fully broken up and cooked, Add your carrots, and now your olives, and start adding your rice, and make sure you mix it all in, and add your cheese, and then mix your sauce.
Cut your peppers at the top, clean them out, and then put your mix in, stuffing them completely full put the tops on
Preheat your oven to 350 degrees and then bake for 20 minutes
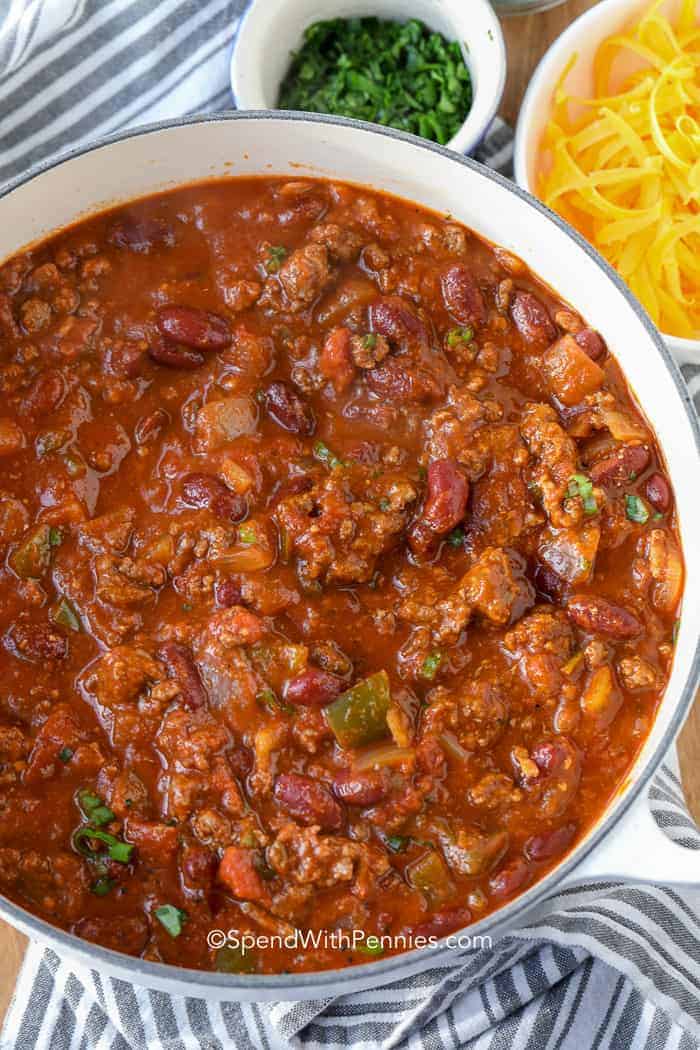
This is a full flavored chili that is awesome, yes it takes a while to make, but its well worth it and fun to eat!
Phase 1 Ingredients
2 Containers of extra lean ground beef A few squirts of BBQ Sauce Liquid Smoke Ground black pepper 1 Green pepper diced 2 Stalks of Celery diced 1 Sweet Pepper diced 1 can of tomato juice 1 Can Kidney beans 2 Cans of crushed tomatoes 2 TBS Smoked rub 3 TBS smoked paprika 3 TBS chili powder 3 Cans of baked beans 2 TBS of Red pepper flakes 2 TBS Cinnimun 2 TBS Garlic powder 1 TBS Allspice 1 Large onion
Phase 2 Cooking
Cook down your beef with some bbq sauce, put a few drops of liquid smoke, put in some ground black pepper, and cook it until the beef is broken down and fully cooked.
In your wok, add the following.
Ground black pepper 1 Green pepper diced 2 Stalks of Celery diced 1 Sweet Pepper diced 2 TBS Smoked rub 3 TBS smoked peprika 3 TBS chili powder 2 TBS of Red pepper flakes 2 TBS Cinnimun 2 TBS Garlic powder 1 TBS Allspice 1 large onion Cook this down fully, when the burger is all cooked add it to the wok, and mix it well, put in the canned tomatoes, if you haven’t add your spices, now add all your beans.
And then cook for 3 hours and your ready to serve.
We hope you like this, this was a great dish and honestly tasted amazing and really did the job! Let us know what you think!
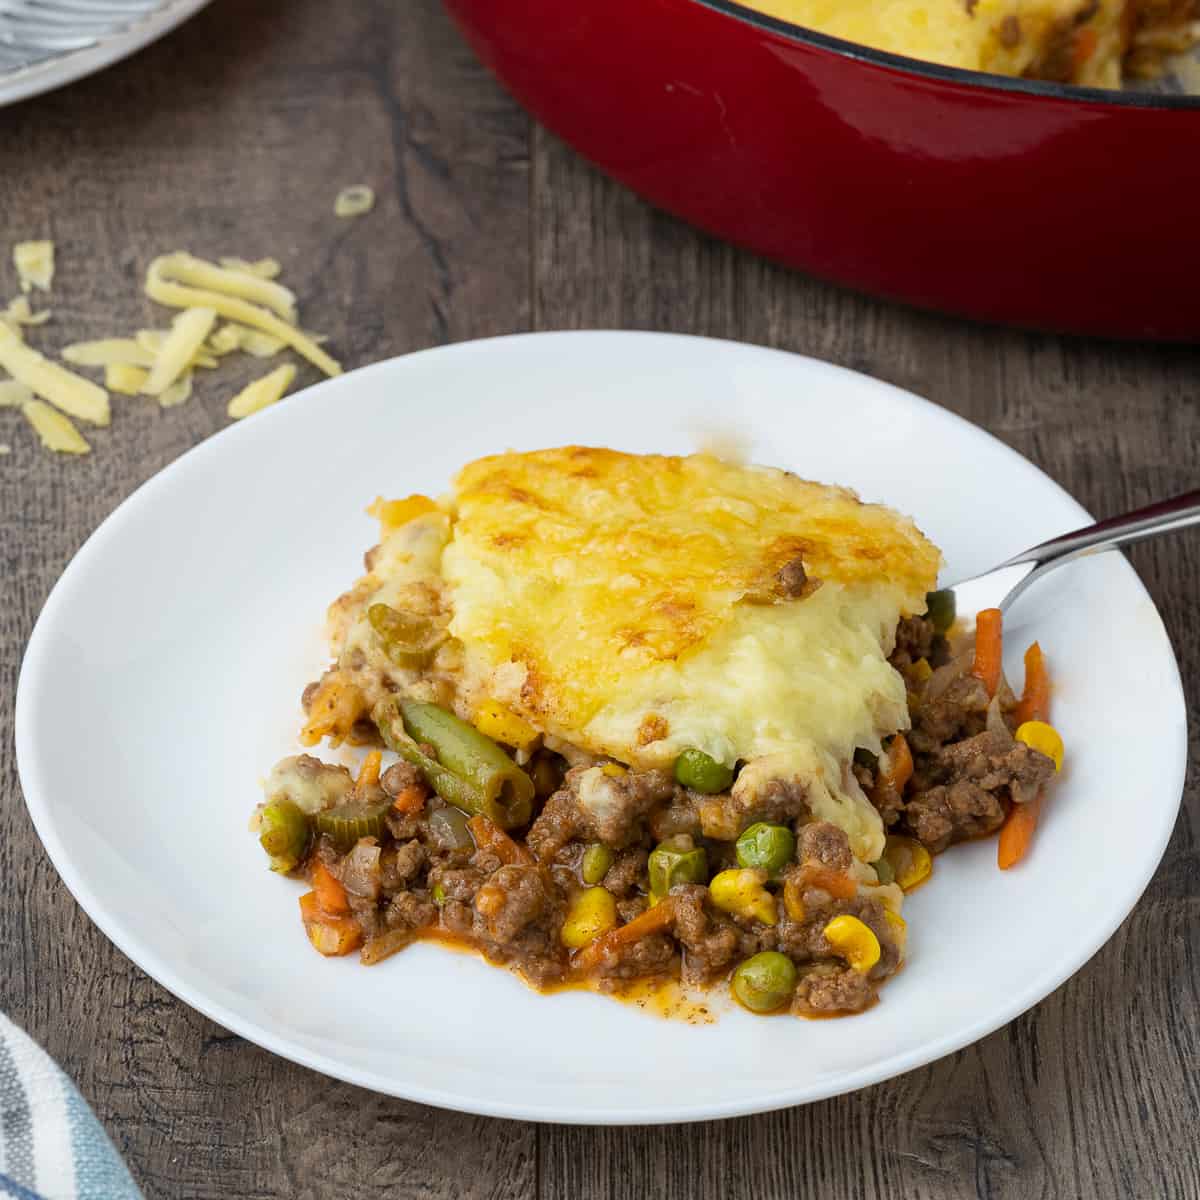
This is an easy and fun dish, nothing complicated, but one that everyone can enjoy!
Phase 1 Ingredients
3 Potatoes chopped into cube Garlic powder 1 liter of skin milk Margarine Parmenion cheese Garlic paste Ginger paste A block of ground beef 2 Grounded up onions 1 Container of low sodium beef stalk 3 Spoon fulls of flower 1 Can of corn 1 Can of peas
Phase 2 Cooking
Put your potatoes and put them in a container and let them sit in water for 30 minutes, after 30 minutes drain and rinse.
Put the potatoes into a pot of boiling water and boil them until they are soft.
Mash your potatoes really good, add milk until it hits the consistency you like, add a spoonful of margarine and add 2 TBS garlic powder, add a few spoonful’s of garlic and ginger paste, and mix it really well, added your grated parmesan cheese.
Start frying some ground beef, add in the onion, garlic powder and mix it well until its fully cooked, then add 1/4 cup of beef stalk, and 3 spoons of flower and keep mixing and it will form its own gravy.
Add in 1 can of corn, and peas, mix it up really good.
Scoop the mixture into a casserole dish until half way done and make sure its packed down.
Then add your potatoes to the top until the dish is full.
Pre heat your oven to 450 degrees, and cook for 30 minutes!
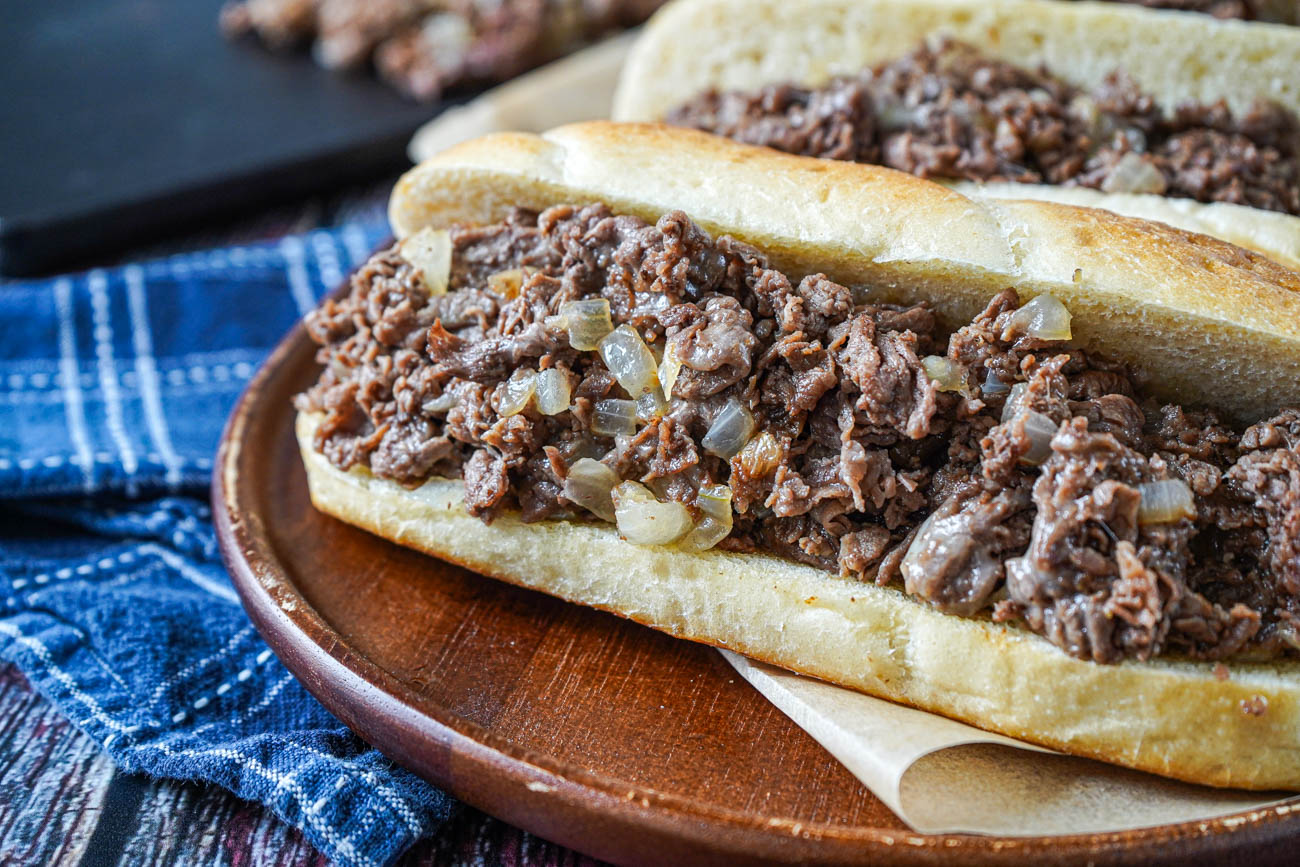
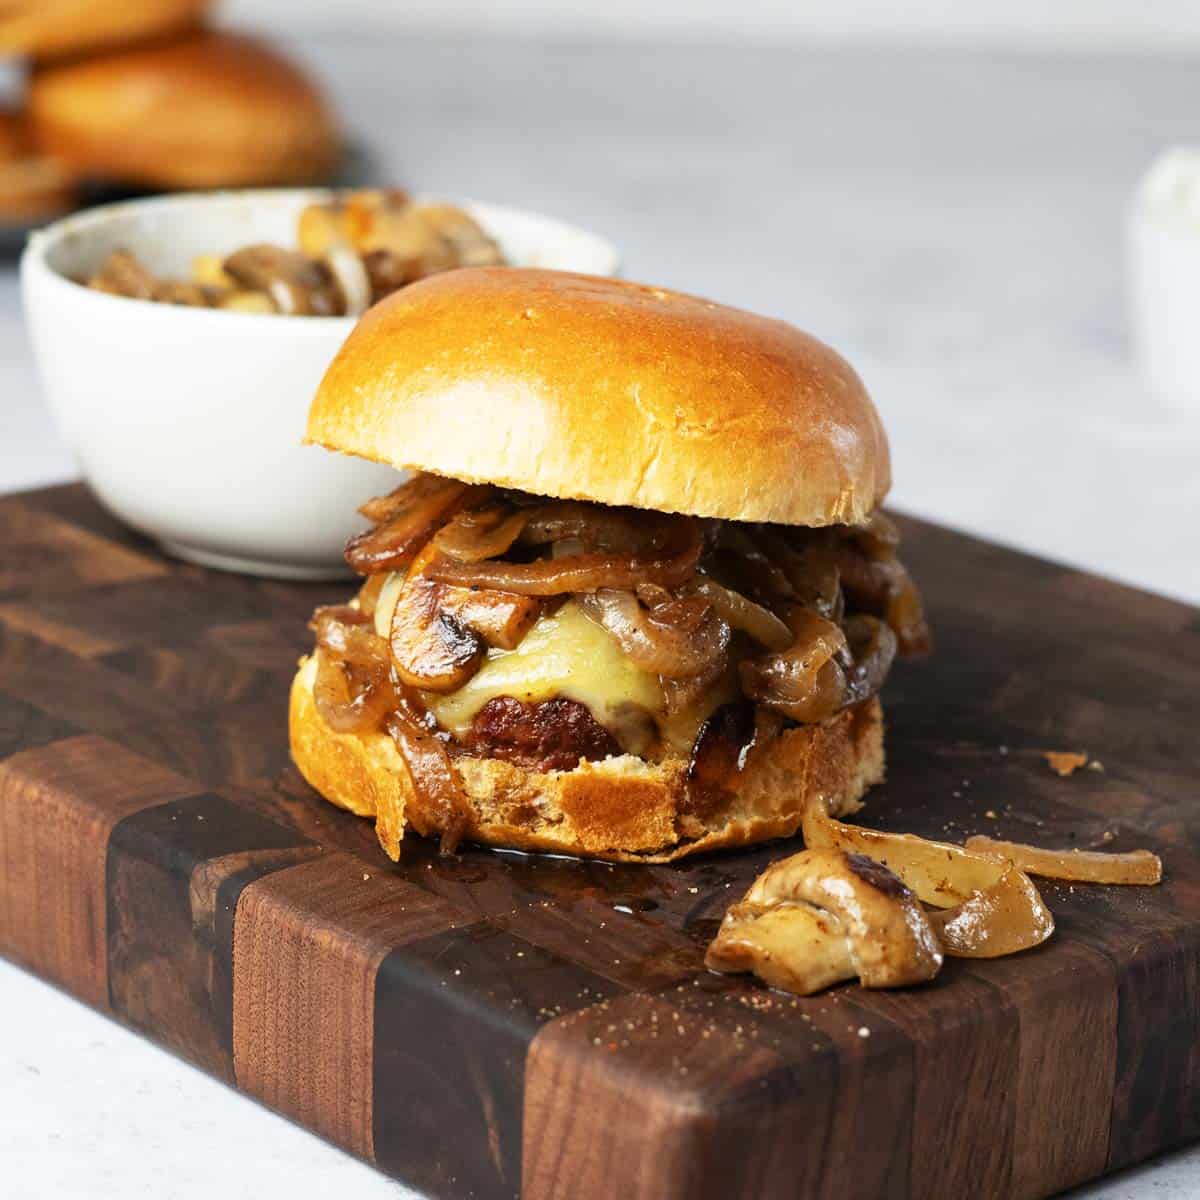
This is an incredible and fast and easy recipe, and tastes so heavenly!
Phase 1. The steak.
buy 2 large steaks and sit them in the freezer for 2 hours.
Phase 2. Prep work
Dice up one large onion, and then cube up the steak.
Ready 1 Get ready Sub bun, you can use some butter, or some mayonaise, no coolwhip please., get some cheese, provolone, would be best, but American cheese, or cheddar is good too.
Phase 3. Fry up the onions until they caramelized, pour in some Worchester sauce, add some pepper, then fry up the steak, both shouldn’t take very long, get everything all fried up.
Phase 4. Build and Serve.
Put your mixed steak and onions in the roll, and top with cheese.
We hope you like this, it is absolutely amazing, tastes great, and was one of the best sandwiches you can make!
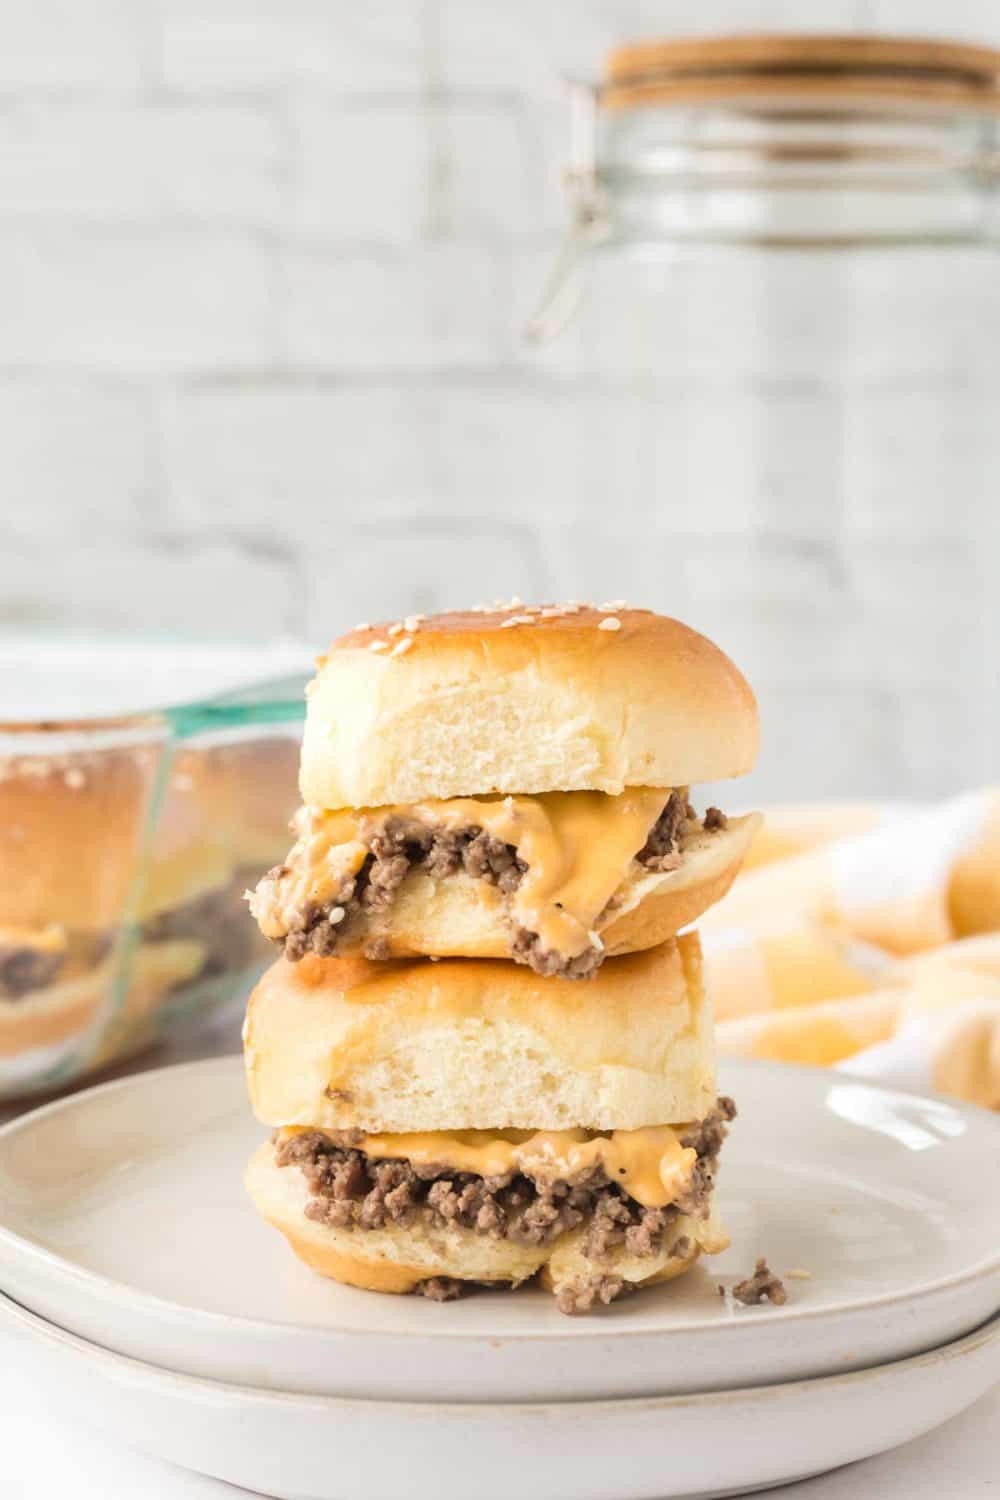
This is a simple and easy recipe, we think everyone should be able to make this, and we know that everyone will enjoy it!
Phase 1. Flattening The Beef
Take a baking tray, and line it with parchment paper.
Add your extra lean beef (or any beef you have on hand) and flatten it over the parchment paper.
Make sure you have it as flat and even as you can.
But them in a shape so they are a bit bigger than the slider buns your going to use, the beef will shrink.
Take a chop stick or something else and poke 5 holes per burger.
Put more parchment paper on top to cover it.
Put it in the freezer for at least 4 hours.
Phase 2. Cut The Beef
Seperate the pattis from each other than put back into the freezer until ready.
Phase 3. Prepping Cooking
Cut up some onion, lots of onion.
If you like your burgers hot, cut up some jalopino too.
Cut your buns in half.
Cut your cheese (If you want.)
Phase 4. Cooking
Put your onion over your pan and jalopino too if your choosing to use it.
Put some water in and let it heat up.
Put the burgers on top of the onion and cook til done.
Phase 5. Putting it together.
Take a burger out, put it into the bottom of a bun.
Make sure you take some onion and jalopino on top.
Add your cheese and close the bun and your done!
We found this to be a yummy and easy recipe, using the water to cook instead of oil elevated the taste and made it sooo much more tasty, we hope you enjoyed this let us know, hit that like, share and subscribe button, thank you.
Big Macs are awesome, however the real version has a lot of sugar in it, and the patties are too thin, and honestly I think if we make it ourselves it will be so much better, and honestly this turned out so amazing my wife and Alex won’t stop begging me to make it again and its only been a few days!
Phase 1 The Sauce
About 1 cup of mayo – Do not us e miracle whip, its garbage, best if you can mayo with olive oil. A few drops of apple cyder vinegar A few spoons of sweet hotdog relish (If you don’t have that you can use a sweet pickled cut up idealy in a food processor first.) A few squirts of a nice BBQ Sauce Do not add ketsup! (too much sugar) Add some Smoked Paprika Garlic Powder Onion Powder Mix it up really good
Phase 2 The Beef
Make some skinny burgers, you do want to fold this into a taco later, so you don’t want a super thick burger patty And then cook your patties, maybe a bit of pepper but not much else. Put some cheese on the top when you flip it once until it melts.
Phase 3 Putting it together You can use a taco shell soft or hard, or you can get a tortilla shell Put your patty in the taco Pour some sauce into it Have some chopped onion on it Then some chopped lettuce Maybe some more sauce
This is best served with some French fries, but its your choice!
We hope you like this, it is definitely one of our favorites, tastes great and best yet its super healthy, and you can use chicken or pork if you like, we have a room mate who won’t eat beef or pork, so we made hers from chicken, and wow it was awesome!
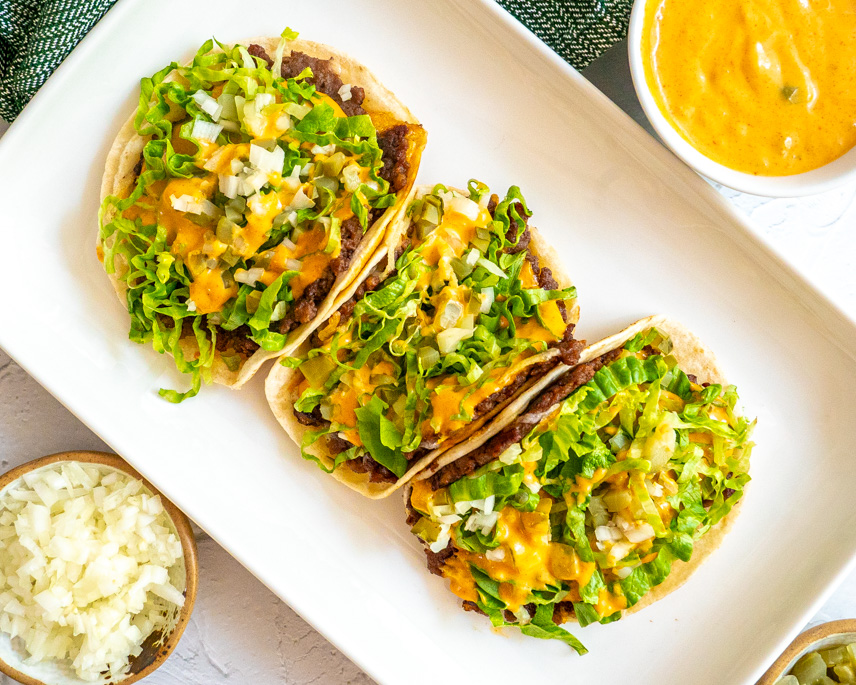
Ever try Taco Bell and get disappointed? Too salty? To mushy, well it sounds to me as if someone needs to make their own, well, we did too, and this turned out amazing, and honestly it was quick simple and easy, very little effort and trust me it turned out amazing!
Phase 1 Chili Time!
Oil your pan lightly Add in some ground beef Add in 1 large or 2 small onions diced up Break burger up so its very small Keep mixing the burger and onion.
Add the following spices to your own taste Mexican oregino Ground cuming Ground black pepper Smoked Paprika and Onion Chili powder Mix the spices up fully and ensure that all your meat gets some love
Add a few drops of apple cider vinegar
Add 2 cups of water
Keep stiring as you add ingredients
Take a glass and add some corn starch in to make a slurry to thicken your sauce and add it to your mix
Cover and simmer for 5 minutes
Add 1 can of refried beans
Add 1 can of tomato paste
Add some adobe chipolte peppers (preferably diced up, if not, take some time and dice the peppers up first.) If you can’t handle heat then please do not add them.
Let simmer for 10 minutes
Shred up half a block of cheese, (Do not buy pre shredded cheese, as it has a higher melting point and is has lots of chemicals and is not as good quality, or even better yet buy some higher quality cheese!)
Start slowly adding the cheese into the mix until cheese is melted, and then add more until its completely melted in.
Take it off the heat.
Phase 2 Serving
Take a tortilla wrap
Add some of the mix in the middle, add some sour cream, even better yet, Mexican sour cream, and then wrap it up, and serve it!
We hope you enjoyed this, if you made this let us know what you think, we really love it, and honestly one of the best dishes we made yet!
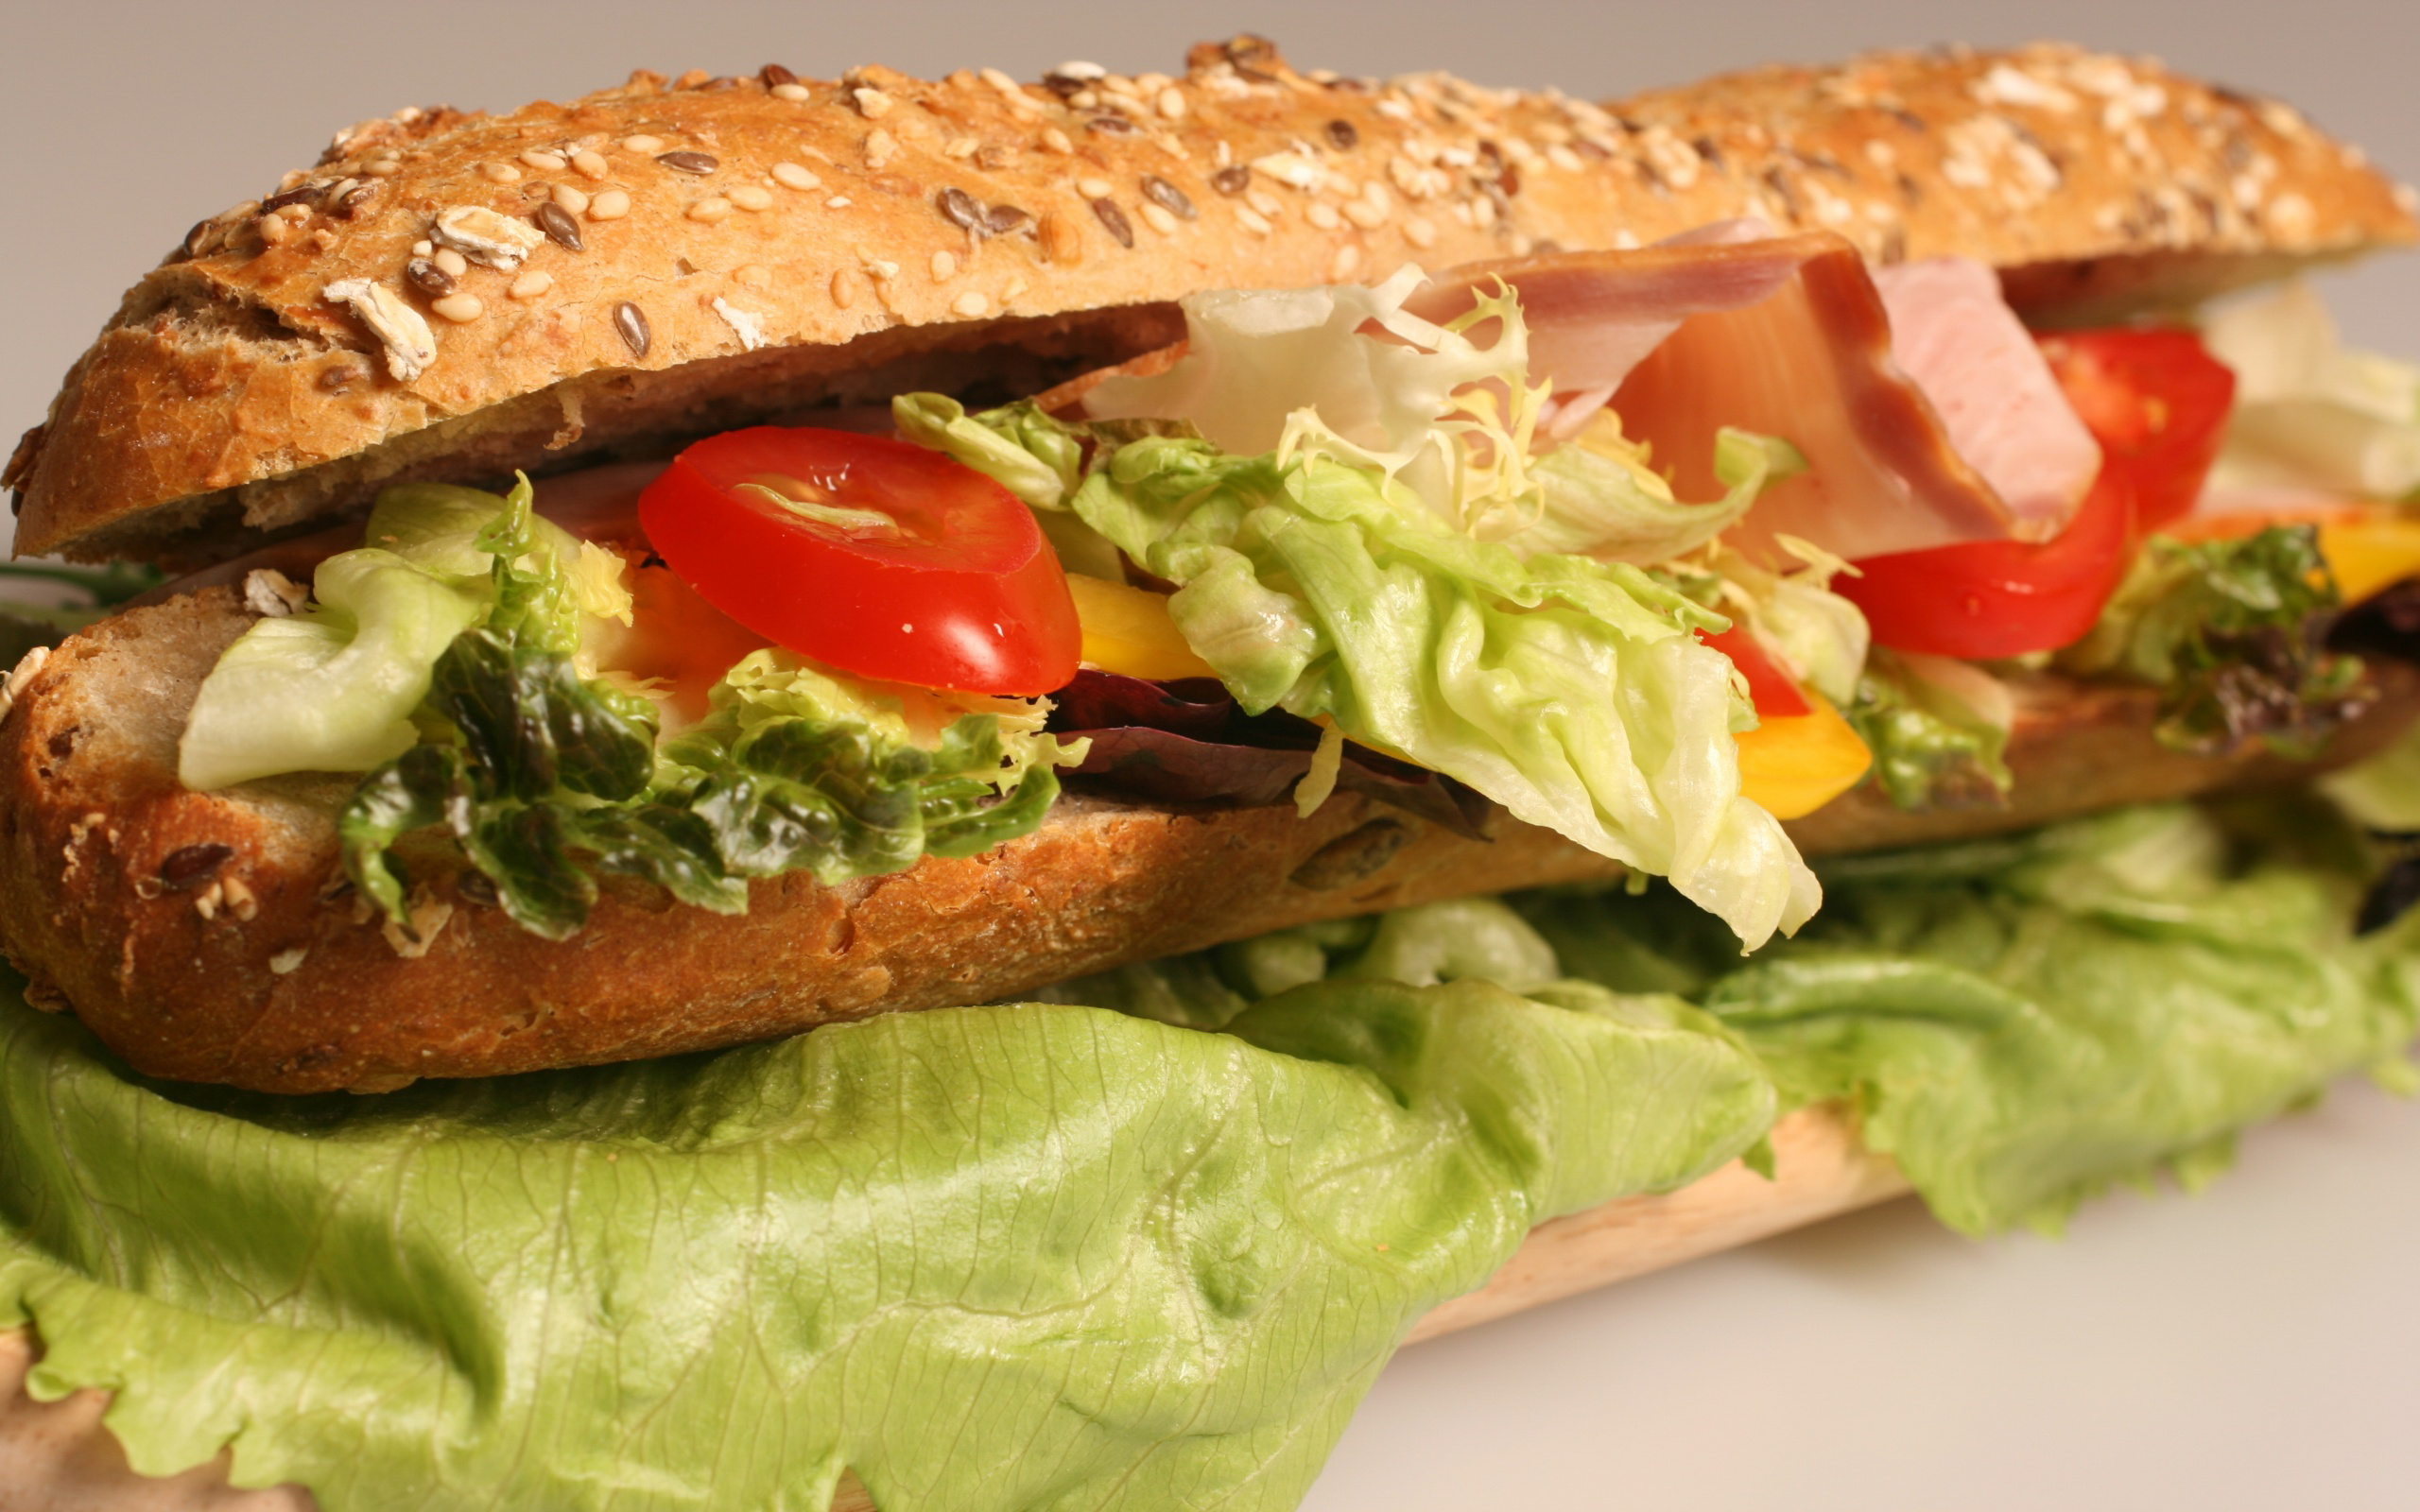
Sandwiches are great, but ever wonder why yours looks bad and get stuck buying one just to get one that looks and tastes great?
I’ve been guilty of it, and I know so have you, but here is the thing, you have to consider the quality of meat your using, the type of bread or bun your using, and sauce and how its going together, it really does mater.
So lets take some time and think about it.
Phase 1. The meat!
The meat is a big part of a sandwich, and often if you go to the store and buy sandwich meat, its thin, not as flavorful and just not the best quality around, so what do we do?
In our video here we used chicken, but you can use pork or a beef product, season it to what you like, pepper, salt if you must (I like low sodium myself), maybe some honey, and bake it until its cooked , but you want it moist.
When done take it out of the oven, let it cool and then slice it thin, or however you like it, many of us don’t have a meat slicer and thats ok, (who has room for that anyways.), when done put it in the fridge for a bit.
Phase 2. Veggies.
Cut up your veggies nice and thin, but remember to use veggies that are dry, cukes and tomatoes are nice and all, but they can often be wet and can make your sandwich a soggy mess, so if your going to use tomatoes make sure you are not putting seeds in, this will ruin it, take those out. you want lettuce or spinach or something similar. make sure to have several varieties or your sandwich is going to be boring.
Phase 3. Sauce.
Directly on the inside of the bun on both sides, I like just plain mayo over that, it acts like a lubricant, and helps keep the bread from going soggy, you can do a mayo mix with hot sauce, or mustard or other things to give it a bit more flavor.
You can use other sauces like BBQ sauces, or a vinaigrette, or other tasty sauces you might want to include.
Phase 4. Cheese
You need cheese, plain and simple and to be honest you do not want cheesewiz, you want something of quality, you can get cheese slices, but honestly that brings you back to just making bland crap, so you can buy a block of cheese and cut that up, or go to the deli and buy a really nice block of cheese, trust me the flavor this brings is so electric and amazing, and trust me the cheese that you get from the deli is actual real cheese, and if you’ve never had it, trust me you need to.
Phase 5. Bread
You could use whtie bread, but when you buy a a good quality sandwich is it on white bread, most often it isn’t, why not choose a multi grain, or even better a nice bun, or roll, after all you want the best quality you can get, and this is going to do it.
Phase 6. Putting it all together!
Ok, so here is the fun part, not the most fun part, that is you eating it.
Take your roll and cut it down the middle, or if its bread just use both slices, but put your mayo, or mayo mix on the bottom of each side, this will act as a lubricant, which helps from keeping the juices getting your bread product
Then put some lettuce on the bottom and layering it nicely.
Now you want to take your meat and start layering that as well, giving it a nice presentation and having enough on it to make you happy.
Now start putting your veggies on it one by one, keeping in mind not to put too many veggies on it as it will make it messy and also hard to close, this isn’t a Subway sub, they do give you lots of veggies, but not a whole lot, and in the end it does look good, but the quality isn’t there.
Now your sauce you want to use, and remember do not over load this, or it is going to be messy, you want to have enough you taste and know its there and are happy, but not so much its going to over flow.
Then your cheese, and you want enough of this, especially if its from the deli.
Then lastly some more lettuce and close your sandwich.
The only thing left to do if you really want, you can put this in a pre heated oven to toast it.
But thats all, try this out some time, and if your someone who would enjoy to bring this to your work for lunch, buy the quantities for the week, and do the math, I bet you its cheaper than buying it every day, and honestly your co workers are going to be jelous!